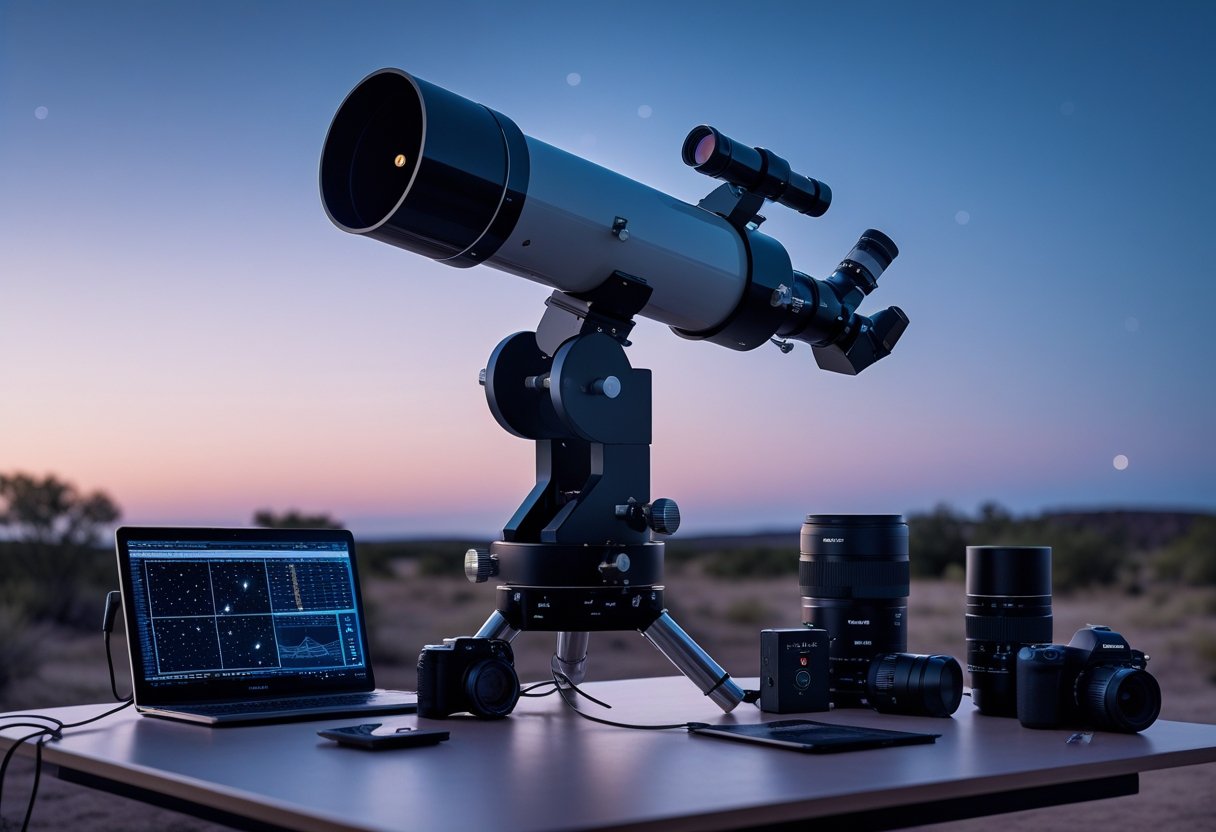
You want gear that helps you capture faint galaxies and nebulae with confidence and minimal fuss. Start with dependable power, accurate tracking, and reliable focusing tools — those three will have the biggest impact on your deep-sky results.
As you build your kit, this guide will walk through the practical accessories that support core astrophotography gear, tracking and guiding, optics and filters, acquisition and control, plus the software and maintenance items that keep sessions productive.
You’ll find clear, budget-aware choices and setup tips that make longer exposures easier, improve image quality, and help you pick inspiring deep-sky targets to match your equipment.
Core Astrophotography Equipment for Deep Sky Imaging

You need gear that balances light-gathering, tracking accuracy, and reliable control. Pick a camera, telescope, and mount that match focal length, payload, and the targets you plan to image.
Choosing a Camera for Astrophotography
Choose between dedicated astronomy cameras and regular mirrorless/DSLR bodies based on sensitivity and workflow. Dedicated CMOS or CCD astronomy cameras (mono or color) give cooling, low read noise, and easy integration with filter wheels. ZWO and other makers offer cooled CMOS options that excel on faint nebulae; monocrome CCD/CMOS sensors paired with LRGB or narrowband filters yield the highest signal-to-noise for emission nebulae.
If you prefer simplicity and wide-field Milky Way work, a full-frame DSLR or mirrorless camera gives large sensors and excellent dynamic range. Use a T-ring and T-adapter to attach your camera to telescopes or focal reducers. Smaller APS-C cameras can work well on short refractors like the William Optics RedCat where field-of-view and weight match the scope.
Consider sensor size, pixel scale, cooling, and whether you’ll use narrowband filters. Pixel size must pair with your telescope’s focal length to hit ~1–2 arcsec/pixel for balanced resolution and SNR. Also check software and driver support (ASCOM/INDI/Camera vendor apps) for remote control and integration with autoguiding systems.
Selecting the Right Telescope
Match telescope type to your targets: refractors for wide-field, reflectors for deep narrow-field detail. An apochromatic refractor (80–110mm, e.g., William Optics-style designs) gives sharp stars, low chromatic aberration, and simple collimation—ideal for wide-field galaxies and emission nebulae. Fast refractors (f/4–f/6) pair well with color cameras and full-frame sensors.
For higher magnification on small planetary nebulae or compact galaxies, consider a larger reflector or a corrected Dall-Kirkham/Newtonian with field flatteners. Keep backfocus and flatteners in mind; many imaging trains require specific spacing to avoid coma or field curvature.
Also weigh weight and portability. Smart telescopes and lightweight refractors let you image from the backyard or remote sites with less setup hassle. Ensure the focuser can accept adapters and a T-ring/T-adapter for your chosen camera.
Essential Mounts and Tripods
Your mount defines exposure length and image quality, so prioritize a stable equatorial mount with suitable payload capacity. An equatorial mount (e.g., Sky-Watcher EQ6-R Pro or similar) with periodic error correction and good PEC, plus autoguiding compatibility, allows you to integrate many-minute subframes without trailing. For very portable setups, lighter mounts like the ZWO AM5 offer a balance of capacity and transportability.
Avoid relying on alt-azimuth mounts for long deep-sky exposures unless you use field rotation correction or a wedge. Use a sturdy tripod—carbon fiber models reduce vibration and weight—and ensure the tripod head and pier are rigid for your mount’s payload. Always size mount payload to exceed your total imaging train (telescope + camera + filter wheel + rotator) by 25–50% for stable guiding margins.
Optics and Adapters
A precise imaging train keeps stars round and focus repeatable. Use field flatteners or correctors with refractors to eliminate edge coma on full-frame sensors. Match thread sizes—M42, M54, M48—and keep a stack of spacers to achieve the telescope’s required backfocus.
Essential adapters include a T-ring/T-adapter for DSLR/mirrorless bodies, a secure camera angle adjuster or rotator for framing, and a robust filter drawer or electronic filter wheel for narrowband/LRGB workflows. Include a reliable guide scope or off-axis guider (OAG) depending on your setup; an Apertura 32mm guide scope or an OAG will reduce flex in longer focal length systems.
Check compatibility: rotators, focusers, and filter wheels must work with your mount and camera via ASCOM/INDI or the vendor’s ecosystem. Small mismatches in threads or spacing create vignetting or poor focus—measure and confirm before buying.
Tracking, Guiding, and Alignment Accessories
These items determine how long you can expose, how sharp your stars are, and how much gear your mount can safely carry. Focus on matching payload capacity, tracking accuracy, and reliable polar alignment to your imaging goals.
Star Trackers and Tracking Mounts
Choose a platform that matches your camera and telescope weight. For wide-field Milky Way work a portable star tracker such as the iOptron SkyGuider Pro or Sky-Watcher Star Adventurer lets you mount a DSLR plus a 24–200mm lens; check the specified payload capacity (commonly 3.5–5 kg) and add a counterweight if you plan to use heavier telephotos or a small refractor.
Look for tracking accuracy and available tracking rates (sidereal, lunar, solar, half‑sidereal) when you need longer unguided exposures. Consider harmonic-drive or worm‑gear equatorial mounts for long‑expo deep‑sky work; they reduce periodic error compared with simpler gearboxes.
Also weigh practical features: battery life or USB power, built‑in polar scope or an iPolar/electronic polar scope option, and whether the unit supports an external guide scope for autoguiding.
Polar Alignment Tools
Precise polar alignment reduces field rotation and shortens guide corrections, so invest in a dedicated tool. An illuminated polar scope built into many trackers works for northern skies, but you’ll get faster, repeatable alignment with an electronic polar scope such as the QHY PoleMaster or the iOptron iPolar camera.
These tools let you capture the polar region, solve the image, and slew your mount to the exact pole position using software. If you prefer phone-based workflows, some Star Adventurer and SkyGuider models offer app‑assisted alignment; others accept laptop control via ASCOM for plate‑solve routines.
A good lat/az equatorial base (latitude adjustment) helps you dial in declination and prevents flex that would otherwise degrade alignment precision.
Autoguiding Solutions
Autoguiding corrects residual tracking errors so you can use longer exposures on small apertures or higher focal lengths. Typical setups pair a small guide scope and a guide camera (e.g., a 30–50mm guide refractor with a CMOS guide camera) or use an off‑axis guider with your main telescope to avoid differential flex.
Choose a guide camera with low read noise and decent sensitivity for faint guide stars; ASI guide cameras integrate well with ZWO ASIAIR/ASIAIR Plus controllers for wireless guiding and plate solving. Software or devices that support calibration, dithering, and subframe guiding give you better tracking accuracy.
Make sure your tracker or mount supports a guide port (ST‑4) or network guiding via ASCOM/EQMOD. Properly configured autoguiding minimizes periodic error on harmonic‑drive and worm‑gear mounts and reduces star elongation across long imaging runs.
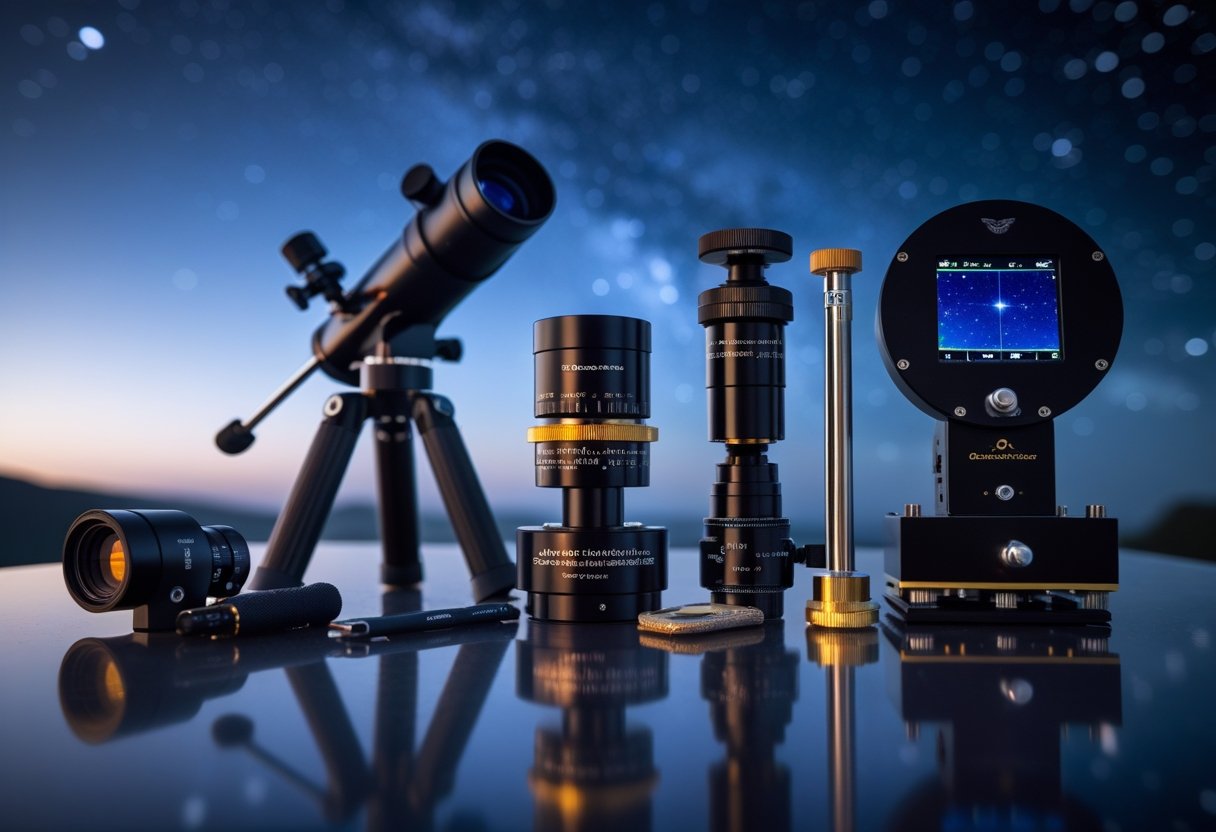
Lenses and Optical Accessories
You need specific optics and simple accessories to capture sharp, flat, and well-focused deep-sky frames. Choosing the right focal length, focal ratio, and corrective optics determines star shape, field coverage, and required exposure time.
Wide-Angle and Telephoto Lenses
For Milky Way and wide-field nebulae, a wide-angle prime lens like a 14mm or 24mm gives big sky coverage and lets you use faster focal ratios to keep exposures short. A Rokinon 14mm f/2.8 (or similar fast wide-angle prime) is popular because its short focal length and f/2.8 aperture gather a lot of sky and light while remaining affordable. Expect some edge coma and field curvature with many wide lenses; plan for calibration and possibly stacking to manage stars at the frame edges.
For smaller, detailed deep-sky objects, use telephoto or long-prime lenses in the 135–300mm range. Longer focal lengths increase magnification but demand a stable equatorial mount or a star tracker and accurate polar alignment. Faster focal ratios (f/2.8–f/4) reduce total integration time but make precise focus and guiding more critical. Choose prime lenses over zooms for sharper stars and consistent coma performance.
Field Flattener and Reducers
A field flattener corrects curvature so stars stay pinpoints across the frame when using refractors or wide-angle lenses not optically optimized for large sensors. Match the flattener’s backfocus spec to your camera’s sensor spacing; incorrect spacing produces edge astigmatism or elongated stars. Many flatteners are quoted for specific focal lengths and sensor sizes—verify compatibility before buying.
Reducers (focal reducers) lower the effective focal ratio and slightly widen the field of view, e.g., turning f/6.3 into f/4.5. That speeds imaging and shortens exposure time but can change image scale and require re-checking focus and flat-field correction. Use a combined flattener/reducer when you want both a wider, faster field and a corrected plane—just confirm the unit supports your prime lens or telescope flange distance.
Bahtinov Mask and Focusing Aids
A Bahtinov mask gives quick, repeatable focus by producing a diffraction pattern with a central spike; you adjust focus until the spike centers. It works well on prime lenses and telescopes when you need critical focus at high magnification or fast focal ratios. Pick a mask sized for your lens front element or telescope aperture; an ill-fitting mask yields weak diffraction spikes.
Complement the mask with live-view zoom (100–200% on a bright star), focus peaking, or software-assisted autofocus tools. For autofocus, use small incremental steps and check with a Bahtinov frame to remove any residual front/back focus error. Keep a lightweight mask and a microfiber cloth in your kit—both are cheap, durable, and save hours of drifted focus in a night.
Advanced Filters and Light Control
You’ll learn how to preserve faint nebula detail in urban skies and how to stop moisture and stray light from ruining long exposures. Focus on filter selection that targets emission lines and on hardware that keeps optics dry and stray light out of the optical path.
Light Pollution and Narrowband Filters
You should match filter type to your target and camera. For emission nebulae, choose narrowband filters such as H-alpha (Ha), OIII, and SII; they isolate specific wavelengths (656.3 nm, 500.7 nm, 672.4 nm) and let you image through heavy skyglow. Use a 3‑nm to 7‑nm bandwidth for best contrast on broadband-polluted sites; wider bands (10–12 nm) work better if you need shorter total integration time.
If you shoot with a color camera, combine narrowband exposures into bi‑color or HOO blends to recover structural detail. For color (LRGB) imaging in suburban skies, use light pollution reduction (LPR) or CLS filters to cut common streetlight lines while preserving continuum light from galaxies and clusters. Check filter thread/size and transmission curves before purchase to ensure compatibility with your camera and filter wheel.
Practical tips:
- Stack long Ha subs to boost SNR for faint filaments.
- Use narrowband on fast optics cautiously; bandpass can shift with incidence angle.
- Consider a dedicated narrowband monocrome camera for maximum sensitivity.
Dew Prevention and Shielding
Keep your secondary and corrector plate dew‑free with a combination of passive and active measures. A dew shield reduces direct sky view and stray light while adding a few centimeters of thermal insulation. Pair it with a controllable dew heater strip around the corrector or lens edge; set heater power to maintain optics a few degrees above ambient to prevent condensation without creating excessive thermal currents.
Mount the heater to a temperature controller or guide‑camera‑integrated controller so you can adjust power during long runs. For refractors and small SCTs, a thin-film heater wrapped near the dew-prone surface works well. For larger optics, use purpose-built ring heaters and an insulating dew cap when idle. Remember to route heater wiring away from the optical axis and secure connections to avoid vibration.
Checklist:
- Dew shield sized to your OTA and focal reducer.
- Adjustable dew heater + temperature controller.
- Cable management and weatherproofing for overnight runs.
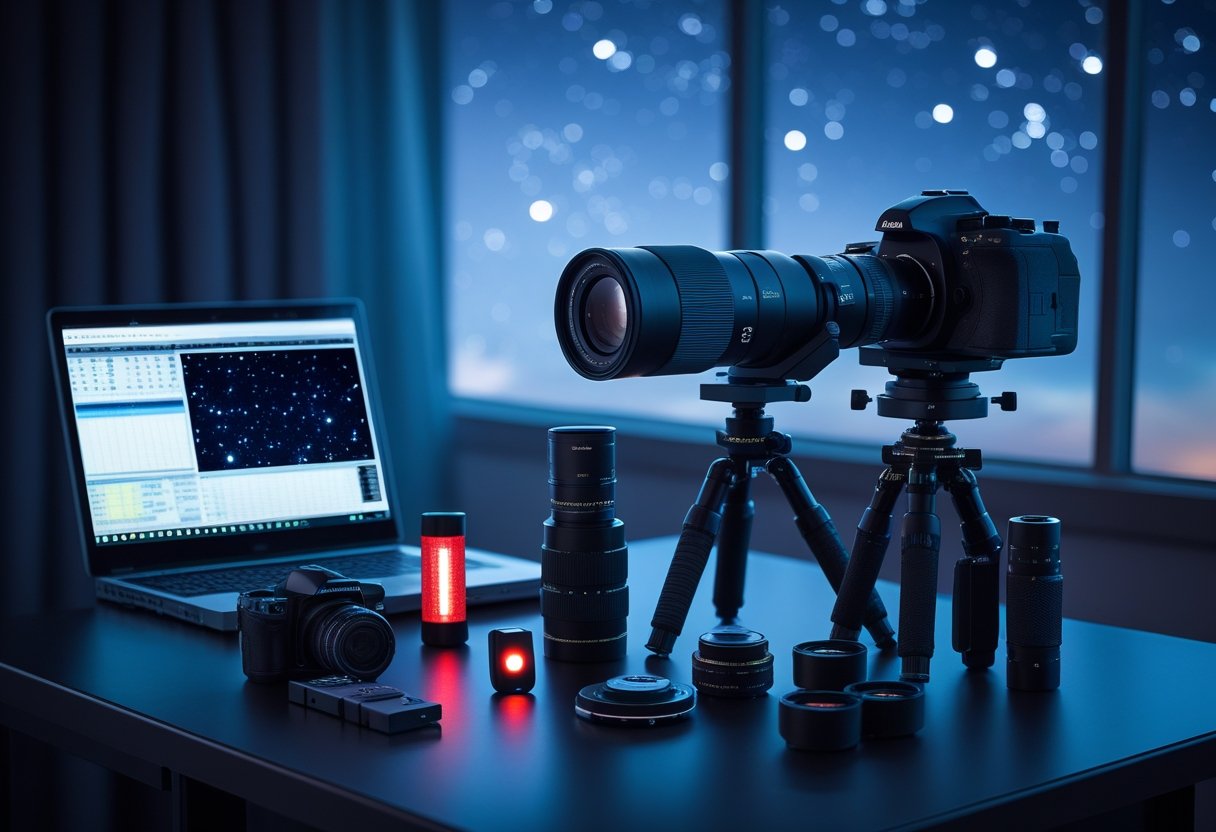
Image Acquisition and Control Tools
You need reliable tools to trigger exposures, automate sequences, and keep your rig powered through long sessions. Pick devices that match your camera and mount, support the exposure lengths you plan, and let you monitor or correct without touching the kit.
Remote Shutter Release and Intervalometers
A wired or wireless remote shutter release (simple cable or IR) prevents camera shake for single long exposures, while an intervalometer automates multi-frame capture for stacking, star trails, and calibration sequences. Choose an intervalometer that supports bulb ramping, programmable exposure counts, and delays; these features let you do subframe dithering, hydrogen-alpha sequences, and automated flats without manual intervention.
If you use mirrorless or DSLR cameras, confirm connector compatibility or use a manufacturer-specific remote. For advanced setups, a Wi‑Fi controller or camera-control app replaces hardware remotes and adds live-view framing, focus adjustments, and file transfer. Wireless options add flexibility at the cost of battery dependence and occasional latency—test them before a session.
Essential checklist:
- Compatibility with your camera model and firmware.
- Bulb ramping and long-exposure support.
- Programmable sequences and interval accuracy.
- Robust cable strain relief or secure wireless pairing.
Power Supplies and Cable Management
Your deep-sky session depends on steady, clean power for camera, mount, dew heaters, and any Wi‑Fi controllers. Use a portable power station or a dedicated deep-cycle battery sized to your total amp-hour draw; calculate run time by summing each device’s consumption and adding a safety margin for cold conditions. For smaller rigs, a regulated 12 V power tank with low-voltage cutoff avoids sudden shutdowns.
Organize cables to prevent snags and electrical noise. Use a single cable hub or fused power distribution box to reduce connections and include inline fuses for protection. Keep signal cables (USB, autoguider) separated from high-current power leads to minimize interference. Label both ends of each cable and secure excess with Velcro straps so you can swap gear quickly at a dark-sky site.
Practical items to carry:
- Portable power station or 12 V battery with known capacity.
- Power distribution box with fuses and multiple 12 V outputs.
- Quality DC cables, USB3 cables, and waterproof connectors.
- Velcro straps and cable labels for fast, tidy setups.
Relevant further reading on gear lists and accessories can be found at a practical guide to must-have astrophotography tools (https://astrophotoguru.com/top-10-must-have-accessories-for-astrophotography/).
Software and Post-Processing Essentials
You need tools that align, clean, and reveal faint details while keeping color and noise under control. Choose stacking software that produces low-noise masters, an editor with robust local adjustment tools, and a planning app that accurately predicts target position and timing.
Stacking and Calibration Programs
Use stacking software to combine your subs and remove sensor and optical artifacts. DeepSkyStacker handles darks, flats, and biases automatically and is a solid free choice on Windows for beginners. For more control over rejection algorithms and weighting, PixInsight gives pixel-level calibration, cosmetic correction, and image integration tools used by many experienced imagers.
Create master dark, flat, and bias frames that match temperature and exposure; poor calibration wastes your signal. Apply cosmetic defect removal and hot-pixel maps before stacking. Check star alignment modes (translation, rotation, affine) if you use focal reducers or wide-field setups. Save a lossless FITS master for post-processing.
Image Editing and Enhancement
Pick an editor you can use for both global and localized adjustments. Adobe Photoshop and Affinity Photo offer advanced layers, masks, and curves for selective contrast and hue control. Lightroom helps batch process color calibration and base exposure across many sub-exposures or subs used for visual documentation. GIMP gives a free route with layer and curve tools, but expect a steeper manual workflow for astronomy-specific tasks.
Prioritize noise reduction and color balance after stretching. Apply multiscale or wavelet noise reduction—preserve fine nebular detail while reducing background noise. Use local masks to protect stars when sharpening or applying deconvolution. Keep an unprocessed master and record your steps or actions so you can retrace changes if color casts or clipped highlights appear.
Planning and Visualization Apps
Plan sessions with apps that show rise/set times, object altitude, and moon phase to maximize useful exposure time. Stellarium gives a free, accurate sky view and customizable observing location; it’s great for checking meridian transits and local light-pollution overlays. SkySafari provides mobile convenience and star charts plus telescope control options for many mounts.
Use these apps to pick imaging windows when targets exceed 30–40° altitude and moonlight is minimal. Export target coordinates or AAVSO/Simbad IDs to your mount control software to avoid transcription errors. Combine a planning app with weather and seeing forecasts to choose nights with low humidity and steady seeing for deep-sky detail.
Must-Have Support & Maintenance Accessories
Keep your optics clean, stable, and easy to manage in the field so you spend less time troubleshooting and more time collecting usable frames.
Lens Cleaning and Maintenance
You need a dedicated lens cleaning kit for safe, repeated use on camera lenses, telescope corrector plates, and eyepieces. Choose a kit that includes a soft-bristled blower, alcohol-free cleaning solution, lens tissue or wipes, and multiple microfiber cloths sized for small optics. Use the blower first to remove loose dust, then apply solution sparingly to tissue (never spray directly on optics) and finish with a clean microfiber cloth in gentle circular motions.
Carry a small, labeled container for spare screws and adapter bits. A compact brush or pen-style cleaner helps reach bayonet grooves and filter threads. For delicate secondary mirrors or corrector plates, use only tools and solutions recommended by the manufacturer to avoid coatings damage. Regularly inspect and clean mounting threads to prevent cross-threading and stuck filters.
Field Comfort and Organizational Tools
Bring mounting rings and a stable platform to keep your OTA secure; well-fitted rings reduce flex and slippage during long exposures. Add a tripod hammock or sling between the tripod legs to hold your battery pack and cable bundle; it lowers the center of gravity and keeps wires tidy. Use anti-vibration pads under tripod feet when operating on hard surfaces to damp micro-vibrations from wind or nearby motion.
Organize small gear in a padded case with labeled compartments for adapters, dew straps, and spare knobs. Include a compact multi-tool and a roll of dielectric or gaffer tape for quick fixes. These simple items prevent lost time troubleshooting gear alignment and cabling issues during your imaging session.
Inspiring Deep Sky Targets and Recommended Setups
Choose targets that match your focal length, mount accuracy, and sky conditions to get the best results quickly. Pick bright, large targets for short focal lengths and travel rigs; choose compact galaxies or planetary nebulae when you have a long focal-length scope and excellent tracking.
Popular Deep Sky Objects to Photograph
You’ll get fast rewards by starting with the Orion Nebula (M42) and the Pleiades (M45).
Both are bright, wide-field targets that look great through a 135–300mm lens or a small refractor. The Orion Nebula reveals structure with just a few minutes of total exposure under decent skies.
For galaxy work try the Andromeda Galaxy (M31) at ~700–1200mm focal length.
It needs longer exposures and better guiding but produces dramatic results. The North America Nebula (NGC 7000) benefits from narrowband or L-enhancement filters if you shoot from light-polluted areas.
Choose targets by angular size: big emission nebulae suit wide-field astrophotography; smaller galaxies and planetary nebulae need longer focal lengths and tighter framing.
Sample Astrophotography Setups
Starter wide-field setup:
- Camera: Full-frame or APS-C mirrorless/DSLR
- Optics: 135–300mm prime lens or 250–400mm small refractor
- Mount: Portable star tracker (Sky-Watcher Star Adventurer-style)
- Accessories: Sturdy tripod, intervalometer, light-pollution filter
This rig excels on Pleiades, Orion, and North America Nebula with 1–5 minute subs.
Intermediate deep-sky setup:
- Camera: Cooled CMOS or mirrorless with T-ring
- Optics: 400–800mm refractor or small APO
- Mount: EQ mount with autoguiding (HEQ5/EM10 class or better)
- Accessories: Guide scope/camera, field flattener, narrowband filters
Use this for Andromeda and detailed nebula work; aim for 2–6 hours total integration with autoguiding.
Advanced high-magnification setup:
- Camera: Dedicated cooled astronomy camera
- Optics: 800–2000mm SCT or refractor + reducer
- Mount: High-capacity equatorial mount (PEP-rated for payload)
- Accessories: Off-axis guider or guide scope, rotator, advanced filters
This handles small galaxies and planetary nebulae where precise tracking and long integrations are required.
Leave a Reply