
You want a telescope that gets you observing quickly and enjoying the sky, not one that sits in the closet. Decide based on what you plan to see and how much hands-on maintenance you want: choose a refractor for low fuss, crisp planetary and lunar views; choose a reflector for bigger aperture and deeper, dimmer objects at a lower price.
If you value ease of use, portability, and low maintenance, buy a refractor first; if you want the best light-gathering for the buck and plan to chase galaxies and nebulae, buy a reflector first.
This article will compare optical performance, maintenance, ease of use, and what each type shows you through real observing examples so you can match a telescope to your goals and budget.
Refractor vs Reflector: The Primary Differences
You’ll learn how each design handles light, what you’ll actually see at the eyepiece, and the main trade-offs to weigh when buying your first telescope. The next paragraphs highlight the mechanical and optical differences that matter for quick setup, maintenance, and viewing targets.
How Light Is Gathered and Focused
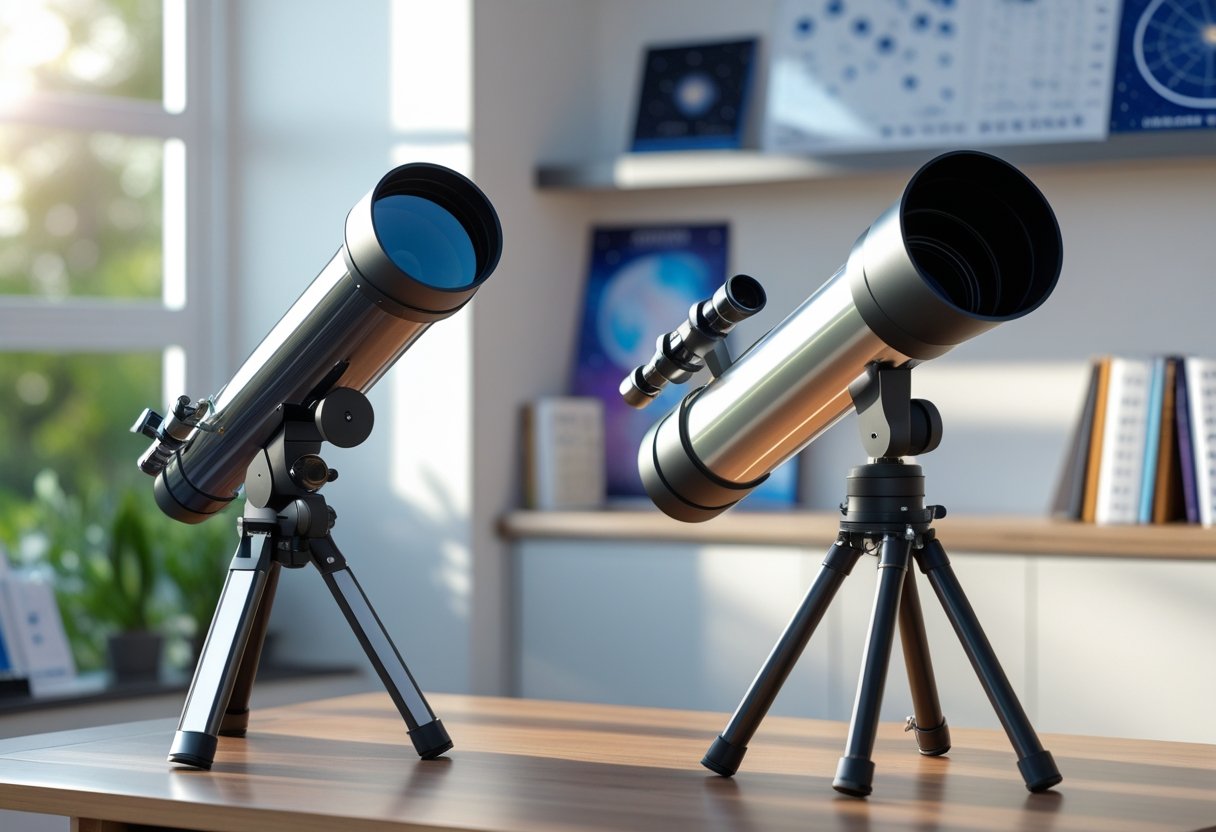
Refractor telescopes use a front objective lens to collect and bend (refract) light to a focal point at the rear of the tube. That single-path glass design sends light straight to the eyepiece, which gives a stable, high-contrast image for planets and the Moon. Lenses can introduce chromatic aberration unless they’re achromatic or apochromatic, which raises cost as aperture grows.
Reflector telescopes use a large primary mirror to gather light and reflect it to a secondary mirror, which redirects the beam to an eyepiece at the side or back of the tube. Mirrors avoid color fringing and give more aperture per dollar, so you can see fainter deep-sky objects like galaxies and nebulae. Reflectors require periodic collimation and mirror cleaning because of the open-tube or ventilation design.
Visual Orientation and Image Quality
With refractors you’ll typically get upright, right-side-up views through simple eyepieces or with small diagonal attachments—convenient for terrestrial as well as celestial use. Expect sharper edge-to-edge performance in short to medium focal lengths, making refractors excellent for high-contrast targets: planets, double stars, and lunar detail.
Reflectors often present a mirrored or laterally flipped view depending on eyepiece setup and finder optics; that’s normal and rarely a problem for night-sky observing. Reflectors can show diffraction spikes from the secondary support vanes and slightly lower contrast for high-resolution planetary work, but they excel at collecting light for faint extended objects. Long focal-length reflectors minimize field curvature and offer wide-field deep-sky performance when paired with modern eyepieces or cameras.
Pros and Cons at a Glance
- Refractor telescopes
- Pros: sealed tube needs little maintenance, stable alignment, high-contrast planetary views, easy setup.
- Cons: cost rises quickly with aperture, chromatic aberration in simple lenses, heavier per inch of aperture.
- Reflector telescopes
- Pros: most aperture for the money, no chromatic color fringing, better for faint deep-sky objects.
- Cons: open tubes collect dust, require collimation, bulkier mounts for large mirrors.
You can use this quick list when scanning telescope reviews or comparing telescope types: if you want a grab-and-go scope for crisp planetary observing, lean toward refractors; if you want maximum light-gathering for nebulae and galaxies within a budget, reflectors give more aperture per dollar.
Optical Performance for Beginners
You’ll learn how image sharpness, light-gathering, and color errors affect what you actually see at the eyepiece. Expect clearer planetary and lunar detail from some designs, while others reveal fainter deep-sky objects because of larger aperture.
Sharpness and Contrast
Sharpness depends on the optical design and how well components are aligned. A refractor’s sealed objective lens gives you consistently high contrast on the Moon, planets, double stars, and star clusters because there’s no central obstruction to scatter light. That contrast makes fine lunar rilles, Jupiter’s cloud bands, and tight double stars appear cleaner.
Reflectors use a primary mirror and a small secondary that creates a central obstruction. This slightly reduces contrast but increases resolving power when aperture is larger. If you choose a reflector with a 130–150 mm primary mirror, you’ll resolve Saturn’s Cassini Division and tighter double stars more often than with a 80–100 mm refractor—provided the optics are well collimated and the mount is steady.
Aperture and Light Gathering Power
Aperture controls how much light reaches your eye; bigger means fainter objects become visible. For deep-sky observation—galaxies, nebulae, and faint star clusters—reflectors deliver more bang per dollar because mirrors are cheaper at larger diameters. A 130 mm reflector gathers roughly (130/102)^2 ≈ 1.6× the light of a 102 mm refractor, making more nebulosity and dim galaxies visible.
Focal ratio also matters: fast refractors (f/5–f/6) give wide fields useful for large star clusters and Andromeda, while slower systems (f/8–f/10) stretch higher magnification for planetary work. Reflectors with short focal ratios (f/4–f/5) show wide views but can introduce coma at the field edges; correctors or eyepieces designed for fast scopes help fix that.
Chromatic Aberration Explained
Chromatic aberration is color fringing when a lens focuses different wavelengths at different points. You’ll notice it as purple or green halos around bright objects like Venus or the lunar limb in simple refractors, especially those with long focal lengths and single-element objectives. This affects perceived sharpness more than true resolving power.
Achromatic refractors reduce the effect by combining two lens elements; ED (extra-low dispersion) or apochromatic triplets reduce it further—useful if you want crisp planet and lunar views without color fringing. Reflectors don’t suffer chromatic aberration because mirrors reflect all wavelengths equally. That makes reflectors strong choices for sharp, color-accurate views of planets and lunar detail when budget and aperture needs favor mirrors.
Key Strengths of Refractor Telescopes
Refractors deliver crisp, high-contrast images with minimal maintenance and a straightforward setup. You get reliable alignment, sealed optics, and compact portability that suit quick observing sessions and daytime use.
Best Uses for Refractors
You’ll find refractor telescopes ideal when portability and immediate use matter. Small- to medium-aperture refractors (60–100 mm) sit on lightweight tripods and let you start observing within minutes. That makes them perfect for backyard sessions, travel to dark-sky parks, or taking on trips where space is limited.
Refractors also double as excellent terrestrial spotting scopes. Their upright image orientation and sharp edge-to-edge performance help when you’re birding, watching boats, or scanning landscapes. If you value a grab-and-go instrument for both night and day, a refractor gives you that versatility without extra accessories.
Maintenance stays simple because the tube is sealed. You won’t collimate mirrors or clean internal optics frequently. For a first telescope, that low upkeep keeps you observing more and fussing less.
Advantages for Lunar and Planetary Views
When you focus on the Moon and planets, refractor telescopes shine for contrast and fine detail. The lens-based design produces tight, well-defined views of lunar craters, rilles, and highland textures. You’ll notice sharper planetary limb definition on Jupiter and clearer ring structure on Saturn compared with many same-cost alternatives.
Chromatic aberration can appear in inexpensive achromatic refractors as color fringing on bright objects. Choose an apochromatic (APO) refractor or one with better glass to reduce that effect; APOs bring nearly color-free performance at modest sizes. You’ll also benefit from high contrast when seeing conditions are fair—small refractors often outperform larger, lower-quality apertures for planetary detail because of steadier thermal equilibrium and fewer optical obstructions.
Key Strengths of Reflector Telescopes
Reflector telescopes give you the most aperture per dollar and deliver neutral-color images without lens-induced color fringing. They let you reach faint objects faster and scale up to large mirrors that reveal structure in galaxies and nebulae.
Best Uses for Reflectors
You want a reflector when budget and light-gathering power matter most. A Dobsonian reflector with an 8–12 inch primary mirror typically shows far more stars and faint fuzzies than a 4-inch refractor at the same price. Use reflectors for wide-field views of star clusters, large emission nebulae, and dim galaxies where aperture translates directly into visibility.
Reflectors also suit visual observing sessions at low magnification and simple astrophotography of bright deep-sky targets. Choose a Newtonian reflector on an equatorial mount if you plan long-exposure imaging; choose a Dobsonian for easy, grab-and-go visual observing that maximizes mirror size for minimal cost.
Maintain your primary mirror’s cleanliness and learn basic collimation; those two tasks keep a reflector performing at its best.
Why Reflectors Excel at Deep-Sky Viewing
Reflector telescopes use mirrors, so they don’t produce chromatic aberration and reflect all wavelengths more uniformly than lenses. That means stars look pinpoint and contrast on faint nebulae improves, helping you detect low-surface-brightness detail.
A large primary mirror gathers more photons per second, which is the key metric for deep-sky observation. The faster your reflector’s focal ratio and the larger its aperture, the better you can resolve spiral arms in galaxies or faint knots in nebulae.
In practice, an 8–10 inch Newtonian reflector or a 10–16 inch Dobsonian often becomes the go-to scope for backyard deep-sky hunting because it balances size, cost, and ease of use while maximizing the amount of light you can collect.
Choosing Your First Telescope: Factors to Consider
You want the best view for your budget, a rig you can carry to dark sites, and an optical system that stays aligned with minimal fuss. Focus on aperture, mount stability, and how much time you’ll spend on upkeep.
Budget and Value for Money
Decide how much you’ll spend and what you want to see. For deep-sky objects, you’ll get more light per dollar with a Newtonian reflector; a 6–8″ Dobsonian delivers far more aperture than an entry-level 90mm refractor. If planets and the Moon are your priority, a 80–120mm apochromatic or high-quality achromat refractor gives sharper high-contrast views for a modest extra cost.
Factor in accessories: eyepieces, a Barlow, a finder, and a sturdy mount often add 20–50% to the advertised kit price. Brand matters less than optical quality and mount stability—budget mounts from brands like Celestron can be fine, but avoid weak alt-az tripods that flex under load. Buy the largest aperture you can reasonably transport and mount without compromising stability.
Maintenance and Collimation
Understand maintenance before you buy. Reflectors require periodic mirror alignment (collimation) and occasional mirror cleaning or recoating; learning simple collimation with a Cheshire or laser tool keeps performance high. Refractors are largely sealed and almost maintenance-free, which reduces downtime and hassle.
If you don’t want to learn collimation, choose a refractor or a pre-aligned Dobsonian with a user-friendly primary cell. For astrophotography you’ll need tighter optical alignment and more frequent checks. Keep in mind mirror alignment affects sharpness and contrast—poor collimation spoils otherwise good optics, so factor in the time you’re willing to spend on setup and care.
Portability and Mount Types
Think about where you’ll observe and how you’ll move the scope. Dobsonian mounts give excellent value and stability for large reflectors, but they’re bulky to lift. Small refractors fit in a car trunk or backpack and pair well with lightweight alt-az mounts for grab-and-go sessions.
Choose the mount to match your goals: an equatorial mount (EQ) lets you track objects precisely and is better for long-exposure astrophotography; an alt-az mount is simpler for visual observing and video work. Motorized GoTo mounts (Celestron and others) add convenience but increase weight and cost. Prioritize a mount that holds steady at high magnification—optical performance only matters if the mount can keep the target centered.
What Can You See? Real Observing Examples
You’ll quickly notice that different targets reward different telescope designs: high-contrast, sharp views for planets and the Moon; deep, faint details for galaxies and nebulae. Your choice affects how bright, detailed, and easy to find each object will appear.
Planets, the Moon, and Double Stars
You can see crisp lunar craters, Jupiter’s cloud bands, and Saturn’s rings well with a quality refractor because it delivers high contrast and minimal alignment fuss. At 80–120 mm aperture a refractor shows the Moon’s terminator details and surface shadows clearly. You’ll resolve Jupiter’s main cloud belts and four Galilean moons easily at 150–300x under steady skies.
Double-star splitting benefits from the refractor’s sharp, high-contrast images; close pairs like Albireo or Castor will hold tight, with colors more distinct.
Reflectors also show excellent planetary detail when well-collimated, but central obstruction slightly reduces contrast. You’ll need larger apertures (6–10 inches) on a reflector to match the resolving power of a mid-size refractor for small planetary features. For high-magnification work on doubles and planets, stability of the mount and good seeing matter as much as aperture.
Galaxies, Nebulae, and Star Clusters
For deep-sky targets like the Andromeda Galaxy, Orion Nebula, and open or globular star clusters, aperture rules. A reflector with a 6–10 inch primary gathers substantially more light than an 80–100 mm refractor, making faint spiral arms, nebular glow, and dense cluster cores visible. You’ll see M31’s core and some structure through a 6–8 inch reflector; a larger scope brings out dust lanes and companions.
The Orion Nebula (M42) responds well to both designs: a refractor gives high-contrast, crisp views of the Trapezium and bright core, while a larger reflector reveals faint outer nebula and extended detail.
Use low- to medium-power eyepieces (25–50x per inch of aperture) for extended objects to maximize contrast and field of view. Narrowband filters (for reflectors and refractors) boost emission-nebula contrast against light-polluted skies.
Terrestrial and Daytime Viewing
If you want daytime use—birding, landscapes, or coastal observation—a refractor is your best first pick. Its sealed tube resists internal dust and stays collimated, and lenses produce erect images or easily accommodated diagonal assemblies for comfortable viewing. A 70–100 mm refractor gives detailed views of distant buildings, shorebirds, and mountain ridges with minimal setup.
Reflectors are less suited for daytime terrestrial use because many designs present an inverted image and require additional optics to correct orientation. Open-tube reflectors also invite dust and stray light during daylight. You can adapt a reflector for land use, but a refractor will be more convenient and deliver more pleasing straight-through views immediately.
Essential Accessories for Both Telescope Types
These accessories improve magnification range, image brightness, and comfort for long sessions. Prioritize a good set of eyepieces and at least one quality Barlow, then consider upgrades that make observing easier and more rewarding.
Eyepieces and Barlow Lenses
Choose eyepieces by focal length and apparent field of view; a 25–30mm low-power eyepiece and a 6–10mm mid/high-power eyepiece cover most needs. Plössl eyepieces give sharp images on a budget, while wide-field designs (e.g., 66°–82° AFOV) make star fields and extended nebulae more immersive. Match eyepiece focal length to your telescope’s focal length to calculate true magnification.
A 2× or 3× Barlow doubles or triples every eyepiece you own, effectively multiplying your magnification range without adding multiple expensive eyepieces. Use a Barlow to keep eye relief comfortable at high power. Make sure the Barlow and eyepieces share the same barrel size (1.25″ or 2″) as your focuser.
If you also want quick wide-sky views or daytime scouting, a pair of astronomy-capable binoculars (7×50 or 10×50) complements your telescope. Binoculars help you learn the sky faster and serve as a portable backup when conditions or time don’t allow full setup.
Upgrades for More Enjoyable Viewing
Start with a sturdy two-axis mount or Dobsonian base—stability beats fancy features for sharp views. Vibration damping pads under tripod legs and a low-profile mount improve steadiness for both refractors and reflectors. Replace flimsy finder scopes with a right-angle correct-image finder or a red-dot finder for faster target acquisition.
Add a low-light red LED flashlight for chart reading and a comfortable observing chair to reduce fatigue. For astrophotography or tracking, consider a small equatorial mount or an electronic alt-az tracking platform—these upgrades let you hold higher magnifications longer without manual nudging.
A simple light-pollution filter helps planetary and Moon contrast in suburban skies, while narrowband filters (OIII, Ha) aid certain nebulae in reflectors with large apertures. Keep a collimation tool for reflectors and a small cleaning kit for both optical types to maintain peak performance.
Leave a Reply